Kapinjalasana: the arm balance that doubles as a backbend

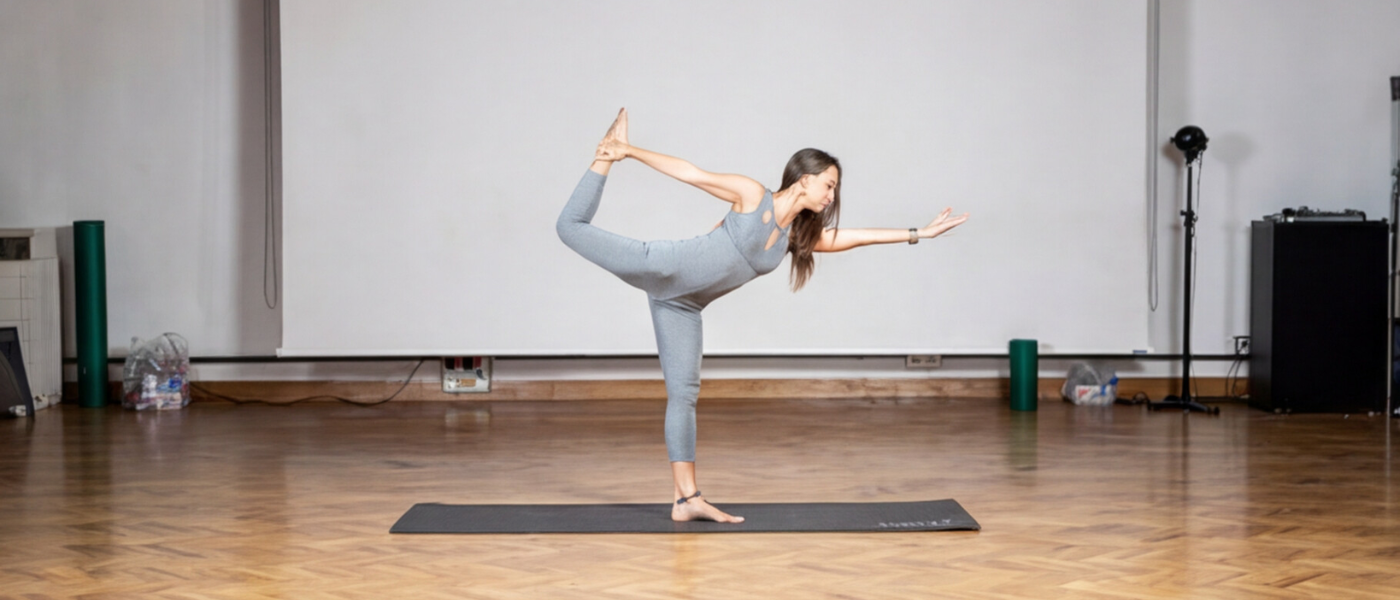
Kapinjalasana, or Partridge Pose, is a dynamic arm balance that folds in a backbend, a rare combination that tests strength, flexibility, and focus at once. This pose begins from a plank pose, requiring you to ground through your left foot and left arm while lifting your right leg into the air. As you transition into Partridge Pose, your upper body and core muscles must work together to maintain balance and stability. The left leg provides a strong foundation, while the right leg extends and bends, creating a deep stretch and a powerful chest opener.
Quick answer
Kapinjalasana combines a backbend into a side-plank base, most arm balances are one or the other, this does both. It builds forearm and wrist strength, obliques, and chest opening. Skip it if you have wrist or carpal tunnel issues; build up through side plank and low lunge first.
This guide is designed for intermediate to advanced yoga practitioners seeking to deepen their practice with challenging arm balances and backbends. Mastering Partridge asana can enhance strength, flexibility, and mental focus.
Practicing this arm balance not only builds physical strength but also cultivates mental resilience. The pose challenges your ability to remain steady and present, especially as you balance on one side of the body. Consistent practice is key to mastering Partridge Pose, as it takes time to develop the necessary coordination and confidence. As you progress, you may find that this pose becomes a fun and rewarding peak in your yoga sequence, offering a sense of “float” before transitioning into other expressive poses like Wild Thing.
Whether you are working on your first arm balance or refining your technique, remember to engage your core, keep your hips lifted, and focus on the connection between your foot, arm, and body. With patience and dedication, Partridge Pose can become a highlight of your practice, enhancing both your strength and your sense of balance.
Now that you have an overview of Partridge pose, let’s define the pose and its context before exploring its benefits..
Partridge pose overview
- Kapinjalasana is a challenging pose that combines elements of arm balance and backbend.
- The pose is traditionally named after Kapinjala, a type of partridge, symbolizing grace, agility, and alert focus.
- Partridge pose is briefly defined as a dynamic arm balance and backbend.
- Partridge Pose is positioned as an arm balance.
- It is a variation of plank.
- Chest opener is a key action in this posture.
With a clear understanding of what Kapinjalasana is, let’s explore the many benefits this pose offers.
Benefits: Strength, balance, and chest opener
Kapinjalasana tones and strengthens muscles, stretches hip flexors, psoas, quads, and chest, and improves spinal mobility. This pose enhances balance and coordination, dramatically improving spatial awareness. It is a powerful preparatory pose for advanced arm balances and a warm-up for the full body. Practicing Kapinjalasana can improve your overall mental and physical well-being.
Upper-body strengthening
- Builds strength in the shoulders, arms, and wrists.
- Engages the upper back and chest muscles for stability.
Core and oblique engagement
- Activates the core and oblique muscles to maintain balance.
- Strengthens the abdominal wall and supports spinal alignment.
Balance and proprioception
- Enhances balance and coordination.
- Dramatically improves spatial awareness and proprioception.
Chest opener and backbend effects
- Deeply stretches the chest, hip flexors, psoas, and quads.
- Improves spinal mobility and flexibility.
- Acts as a powerful chest opener and backbend.
Now that you understand the benefits, let’s review important safety considerations before attempting the pose.
Contraindications and safety (Carpal tunnel syndrome, knees)
- Kapinjalasana is an advanced pose and should be avoided by beginners until they develop sufficient balance and flexibility.
- Carpal tunnel syndrome is a contraindication for this pose.
- Avoid practice with acute wrist pain.
- Medical clearance is recommended for those with recent knee surgery.
- Wrist-sparing modification suggestions are available for those with wrist concerns.
With safety in mind, let’s move on to the step-by-step process of practicing Kapinjalasana.
How to do kapinjalasana: From plank pose to side plank
Step 1: Transition from plank to side plank
- Start from Plank asana with a neutral spine.
- Transition into Side Plank (Vasisthasana), stacking your feet.
- Keep your left knee straight and engaged, or bend the left knee slightly for support if practicing a variation.
- Stabilize the bottom foot by pressing the sole flat on the floor, grounding through the big toe and heel.
Step 2: Lifting and positioning the top leg
- Lift the top leg and bend the top knee.
- Reach for the lifted foot with your left hand (or right hand, depending on the side).
- If needed, use a yoga strap to assist in reaching the foot.
- Keep the right knee aligned and avoid straining it.
Step 3: Grabbing the foot and opening the chest
- Rotate the top arm and open the chest into a backbend.
- Send your hips forward to deepen the stretch and maintain stability.
- Push your pelvis forward to prevent falling backward.
- Ensure a good deal of shoulder opening to arrive at the peak.
Step 4: Exiting the pose
- Demonstrate a safe exit into Wild Thing or Downward-Facing Dog.
- Maintain focus, strength, and stability to hold Kapinjalasana.
- Consistent practice will help you find strength and stillness in this pose.
Now that you know the steps, let’s look at some variations and modifications to suit different levels and needs.
Plank pose variation one: Lower knee to side plank
- Lower the base knee for additional support.
- This reduces the load for beginners.
- Hands-to-knee option can be used for extra stability.
Pose variation one knee: Side plank with lower knee
- Progress by keeping one knee down as you build strength.
- Gradually increase hold times for beginners.
- Be mindful of hip alignment and avoid hip collapse.
Variations and modifications (Side plank variants)
- Side plank variations:
- Classic side plank (Vasisthasana)
- Forearm side plank
- One-knee side plank
- Strap-assisted Partridge Pose variation for increased accessibility.
- Lower knee and one-knee modifications for reduced intensity.
- Wall-supported option for added stability.
With these variations in mind, let’s discuss the importance of preparatory poses.
Preparatory poses
Practicing preparatory poses is essential for successfully performing Kapinjalasana. Yoga sequences for Partridge Pose (Kapinjalasana) should include preparatory poses to enhance the practice.
- Poses to build wrist and shoulder strength:
- Plank Pose
- Dolphin Pose
- Downward-Facing Dog
- Chest opener preparatory poses:
- Cobra Pose
- Upward-Facing Dog
- Bridge Pose
- Core-engaging plank variations:
- High Plank
- Forearm Plank
- Side Plank Hip Lifts
- Quad and hip-flexor stretches:
- Low Lunge
- Runner’s Lunge
- Reclined Hero Pose
Side plank pose progression
- Practice forearm side plank before full hand version.
- Work on side plank with stacked feet alignment.
- Introduce side plank hip lifts for added strength.
Plank Pose Preparations
- Practice high plank to build shoulder stamina.
- Use plank variation one for gradual load.
- Incorporate low plank for core control work.
With your body prepared, let’s focus on breath awareness to support your practice.
Breath awareness and practice
Breath cues for entry
Breath awareness is a crucial aspect of practicing Partridge Pose, also known as Kapinjalasana. This challenging arm balance requires focus, strength, and significant shoulder opening to reach the peak position. To begin, start by standing on the left foot, with the right leg lifted and bent behind you. As you inhale, lengthen the spine and engage the core muscles to maintain balance.
Maintaining breath in the pose
Exhale and gently press the right foot into the hand, deepening the stretch in the upper body. As you practice Partridge Pose, bring awareness to the breath, taking a few breaths to settle into the pose. Feel the stretch in the hips and the engagement of the leg muscles, particularly in the left leg. The left forearm and left arm play a crucial role in maintaining balance, so ensure to keep them strong and stable. The right arm, on the other hand, is responsible for grabbing the right foot, so be mindful of the stretch in the shoulder and the potential for carpal tunnel syndrome.
To modify the pose, use a yoga strap to assist in bringing the hand to the foot. This pose variation can help reduce the strain on the shoulders and wrists, making it more accessible for beginners. As you practice, focus on maintaining balance and control, keeping the hips lifted and the chest open. The psoas muscles and hip flexors are also engaged, so be sure to warm up thoroughly before attempting the full pose.
Breath for exiting the pose
As you come out of the pose, take a few breaths to release any tension, and then repeat on the other side. Remember to keep the breath deep and steady, using it to guide you into and out of the pose. With regular practice, you’ll find that your balance and confidence level improve, allowing you to tackle even more challenging poses like Wild Thing. So, take a deep breath, engage your core, and lift off into Partridge Pose, feeling the sense of accomplishment and pride that comes with mastering this beautiful and challenging arm balance.
With breath awareness established, let’s look at how to sequence Kapinjalasana in your practice.
Sequencing: Warm-up, peak pose, and follow-up
- Order dynamic shoulder warm-up before peak work.
- Place Kapinjalasana near the sequence peak.
- Add chest opener follow-ups after the peak.
Now that you know how to sequence your practice, let’s review common mistakes and teaching tips.
Common mistakes, cues, and teaching tips (Arm balance)
- Cue shoulder stacking directly over the wrist.
- Cue core engagement to protect the lower back.
- Remind students to keep gaze steady for balance.
- Offer spotting techniques for safer transitions.
With these cues in mind, let’s address therapeutic considerations for those with wrist issues.
Therapeutic notes: Carpal tunnel syndrome considerations
- Explain wrist-sparing alternatives for carpal tunnel syndrome.
- Recommend wrist braces only with medical advice.
- Advise referral to a hand therapist for persistent numbness.
If you need to decrease the intensity, consider the following options.
Lower knee options and recovery
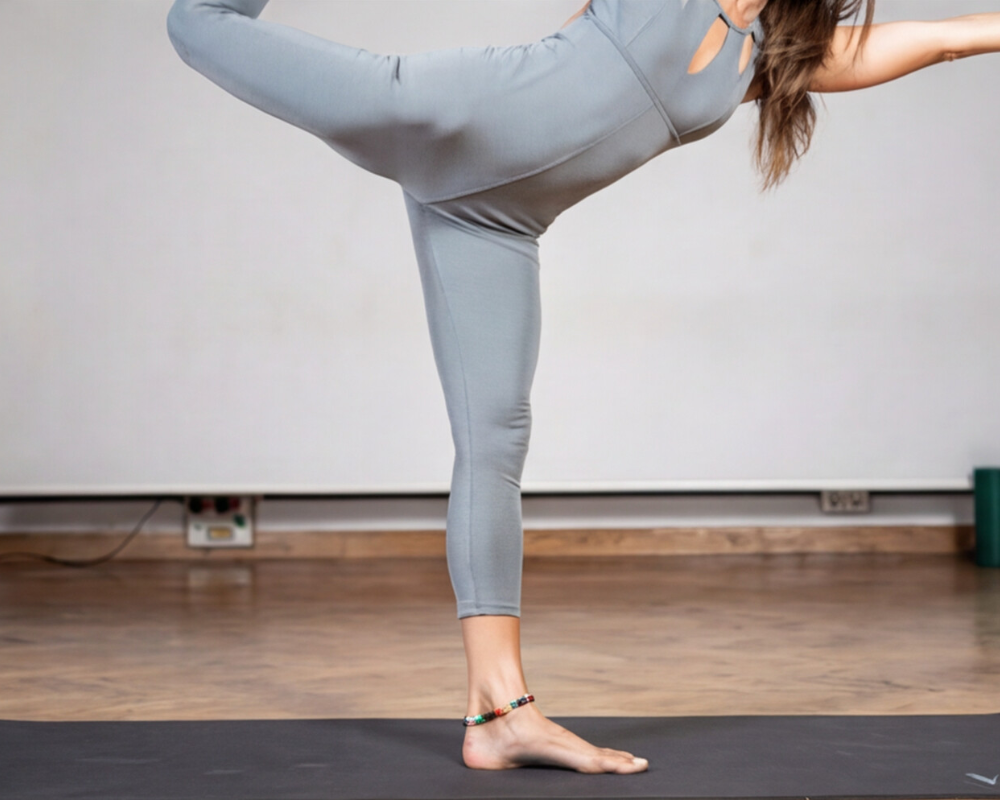
- Offer lower knee transitions to decrease intensity.
- Recommend counterposes for shoulders and chest.
- Suggest rest and icing for acute wrist soreness.
After practicing Kapinjalasana, it’s important to unwind with relaxing poses.
Relaxing follow-up poses
After exploring the intensity of Partridge Pose, it’s important to give your body time to unwind and recover. Incorporating relaxing follow-up poses into your practice helps release any tension built up in the shoulders, arms, and legs, and supports overall muscle recovery.
Runner’s lunge and low lunge
- Gently stretch the quadriceps and hip flexors.
Side plank with knee down
- Offers a supported way to maintain strength without overexertion.
Child’s pose and forward fold
- Gentle arm twists in Side Plank or transitioning into Child’s Pose can further relax the upper body and calm the mind.
- Downward-Facing Dog and Seated Forward Fold are excellent for stretching the entire body, especially after the deep backbend and arm balance of Partridge Pose.
As you move through these follow-up poses, focus on slow, deep breathing and allow your body to fully relax into each stretch. This mindful approach not only enhances flexibility but also helps prevent stiffness and supports a balanced, sustainable yoga practice.
By making these relaxing poses a regular part of your routine after Partridge Pose, you’ll help your body recover, maintain healthy shoulders and knees, and create space for growth in your practice.
Now that you know how to recover, let’s wrap up with some final tips.
Conclusion and final tips
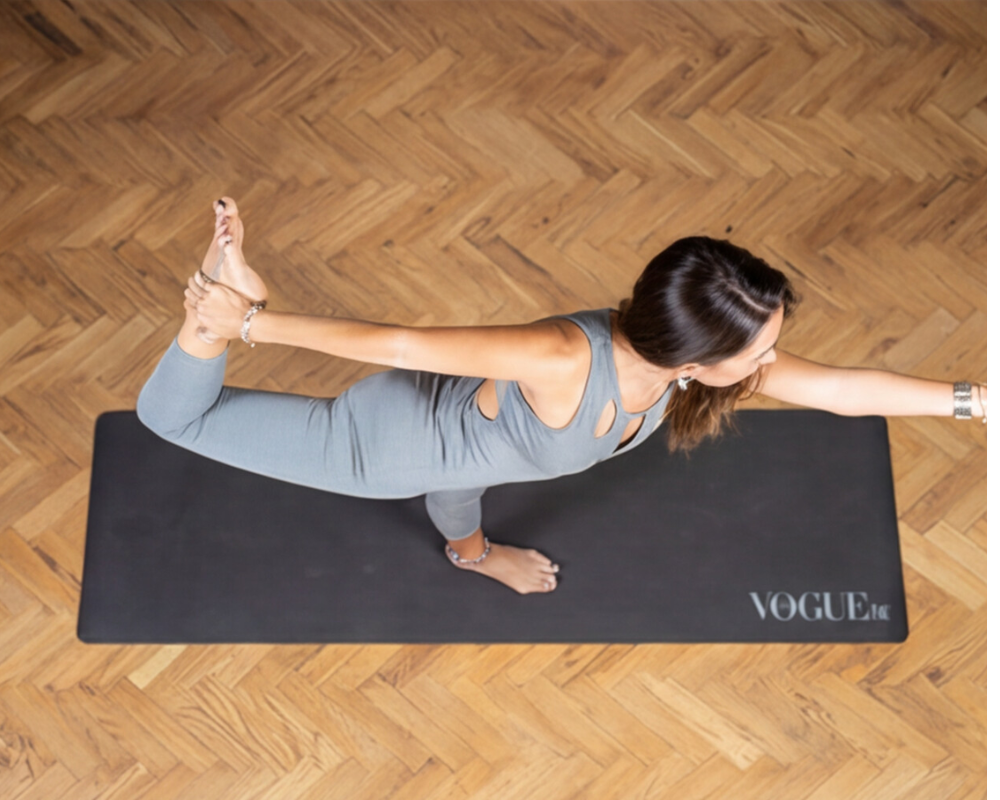
Partridge Pose is a powerful and rewarding addition to any yoga practice, offering a unique blend of arm balance, backbend, and deep stretch. To approach this challenging pose safely and effectively, start with preparatory poses like Side Plank and Half Moon to build the necessary core muscles and upper body strength. As you move into Partridge Pose, focus on maintaining balance, engaging your core, and using deep breathing to support your body.
Don’t hesitate to use props such as a yoga strap to help you reach the full pose, and remember that consistent practice is the key to progress. Listen to your body, modify the pose as needed, and take breaks when necessary to avoid strain. Working with experienced yoga teachers can provide valuable guidance on alignment and technique, helping you build confidence and self-esteem as you master this challenging arm balance.
With patience, dedication, and mindful practice, you’ll discover the many benefits of Partridge Pose,including improved strength, flexibility, and a greater sense of balance in both body and mind. Embrace the journey, trust your process, and enjoy the sense of accomplishment that comes with each step forward on your yoga path.
For further learning, check out the resources below.
Teaching arm balances like Kapinjalasana as your specialty? Build visibility around your signature pose through Pose for a Cause.
FAQs
Kapinjalasana is commonly known as Partridge Pose in English. The name comes from the Sanskrit word Kapinjala, which refers to a type of partridge bird. The pose reflects the partridge’s grace and balance through a challenging combination of arm balance and backbend.
Partridge Pose, or Kapinjalasana, is a dynamic yoga pose that combines an arm balance, backbend, and chest opener. It typically begins from a Side Plank variation and involves lifting the top leg and reaching back to grab the foot, creating a powerful stretch and balance challenge.
Yes, Kapinjalasana is considered an intermediate to advanced yoga pose. It requires a combination of arm strength, core stability, balance, and flexibility in the shoulders and hip flexors. Beginners are encouraged to build strength with poses like Side Plank before attempting the full expression.
Partridge Pose strengthens the shoulders, arms, wrists, and core muscles, especially the obliques. It also stretches the chest, hip flexors, quadriceps, and psoas, while improving spinal mobility and overall body coordination.
If you can’t reach your foot, you can use a yoga strap around the lifted foot to bridge the gap. Another option is to keep the top leg bent without grabbing the foot, or practice a supported Side Plank variation with the lower knee on the ground to build strength and stability first.
Free Wellness E-Book
Find Your Zen!
Your Free Guide
To Wellness
Download Your Free Guide & Receive Weekly Inspirations From The Lifestyle Of a Modern Yogi!