How to do Warrior 3 Pose (Virabhadrasana III) with alignment, benefits, and modifications
Warrior 3 Pose, or Virabhadrasana III, is a powerful standing balance pose that challenges the body and mind. It strengthens your legs, core, and back while testing your focus, stability, and alignment.
With over 37 years of yoga practice, including a background in athletics and teaching, I’ve found this pose to be one of the most transformational in building strength with grace.
In this guide, I’ll break down the benefits, alignment principles, common mistakes, and practical variations for Warrior 3, including insights from my own experience as a teacher and practitioner.
What is Warrior 3 pose?
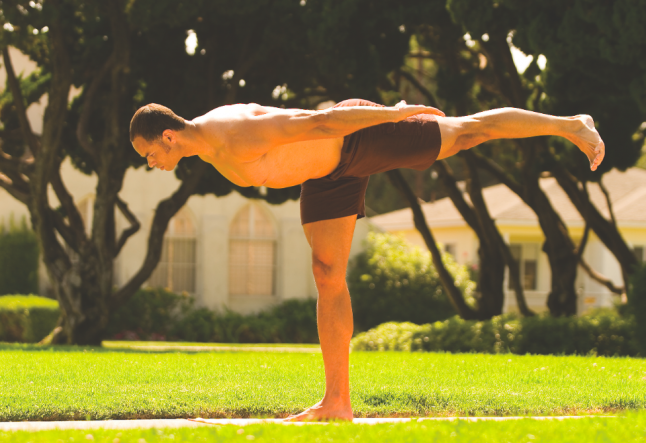
- Traditional Warrior 3 Pose
- Warrior 3 with blocks
- Warrior 3 using a wall for support
What is warrior 3 pose?
Warrior 3 (Virabhadrasana III) is the third in the warrior series and represents a fierce yogic archetype-rooted, strong, and unwavering. In this pose, the body forms a “T” shape: one leg grounded, the other extended behind, with the torso and arms reaching forward.
Sanskrit breakdown:
- Vira = Hero/Warrior
- Bhadra = Blessed/Auspicious
- Asana = Pose
It is traditionally linked to the legend of Virabhadra, a fierce incarnation of Shiva created to restore balance.
Benefits of Warrior 3 pose
• Core strength
Engages the abdominals and lower back muscles
• Glute & hamstring activation
Tones and strengthens both legs
• Improves balance
Challenges proprioception and spatial awareness
• Postural alignment
Encourages spinal elongation and awareness
• Ideal for runners
Builds hip strength and supports endurance training
• Stimulates focus
Cultivates mental clarity and concentration
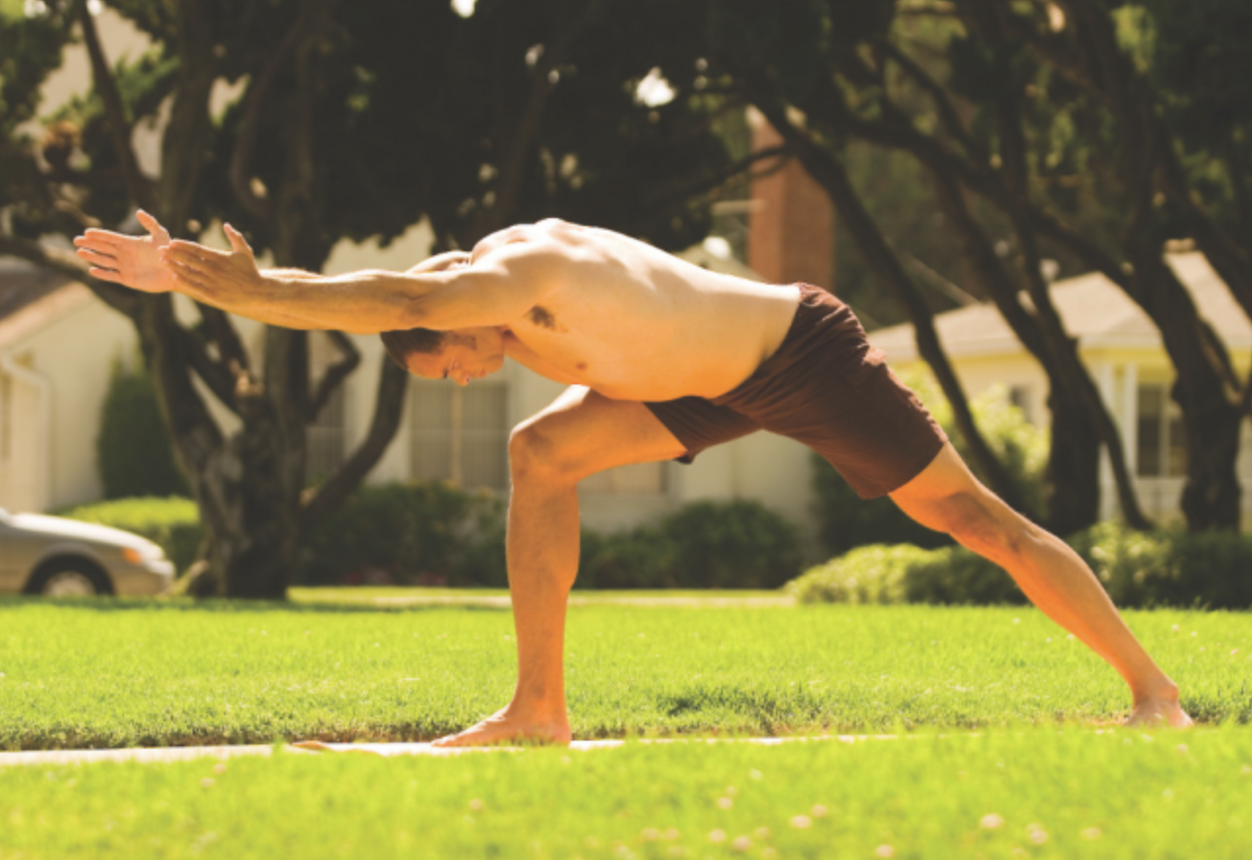
Learn more benefits and variations of Triangle Pose, equally beneficial yoga pose as Warrior 3.
How to do Warrior 3: Step-by-step instructions
- Start in Warrior I with your right foot forward.
- Take a deep breath. On the exhale, hinge your torso forward and rest your chest lightly on your right thigh.
- Reach your arms forward, keeping them shoulder-width apart.
- As you exhale again, shift your weight into your right foot and begin to lift your left leg straight behind you.
- Straighten your standing leg as much as your balance allows.
- Level your hips-rotate the left hip down and engage your glutes.
- Reach through the crown of your head and your lifted heel, creating one long line.
- Hold for 3–5 breaths.
- To exit, bend the right knee slightly and step back into Warrior I.
Alignment tips
- Keep hips squared to the mat
- Avoid collapsing the chest-lift through the sternum
- Press down through the ball of the standing foot
- Flex the raised foot and keep toes pointing down
- Gaze forward or down to maintain neck alignment
Common mistakes to avoid
- Overarching the lower back: Engage your core to protect your spine
- Hip opening: Ensure the raised leg’s hip stays level with the grounded one
- Locked standing knee: Slightly bend the knee if you feel strain
- Arms overextending: Keep them aligned with your ears, not higher
Modifications and variations
- Hands at heart: Bring palms to prayer position to reduce shoulder strain
- Use blocks: Place hands on yoga blocks for additional support
- Wall support: Rest your lifted foot or hands against a wall
- Chair assist: Place hands on the back of a chair while lifting the leg.
Preparatory and counter poses
- Prepare with: High Lunge, Tadasana, Plank Pose
- Counter with: Forward Fold, Child’s Pose
A teacher’s insight: Warrior 3 in my practice
As a former track sprinter, I originally sought yoga to complement my physical training. But over time, Warrior 3 became more than a physical posture-it taught me the balance between control and surrender. I often tell my students: Warrior 3 is where your ego learns humility, and your focus becomes your superpower.
This pose also shifted my perspective as a male teacher. It blended the yang of strength with the yin of grace. It reminded me that balance isn’t about perfection-it’s about presence.
FAQ: Warrior 3 pose
Q: Is Warrior 3 suitable for beginners?
A: Yes, with props like blocks or a wall. Beginners should focus on hip alignment and avoid locking the standing knee.
Q: Why is it hard to balance in Warrior 3?
A: It challenges multiple muscle groups and your proprioception. Use your breath to stay centered and practice often.
Q: Should my lifted leg be higher than my torso?
A: No. Aim for the leg to be parallel to the floor, hips level, and toes pointing down.
Q: How long should I hold Warrior 3?
A: Start with 3–5 breaths and work your way up to 10 with consistent practice.
Q: What are good follow-up poses after Warrior 3?
A: Standing Forward Bend, Tree Pose, or a gentle seated twist can help reset your body.
Closing thought
Warrior 3 is a beautiful metaphor for life: one foot grounded in the present, the other reaching toward possibility. It teaches us strength in stillness, clarity in motion, and the art of unwavering focus.
Whether you’re a runner, a beginner, or a seasoned yogi, integrating this pose into your practice will deepen your balance-not just on the mat, but within yourself.
Free Wellness E-Book
Find Your Zen!
Your Free Guide
To Wellness
Download Your Free Guide & Receive Weekly Inspirations From The Lifestyle Of a Modern Yogi!